Add to Technorati Favorites
I would encourage you to do something every week to help with your personal preparedness. Learn something, buy something, teach something or do something. Doing a little each week will pay off .

Saturday, May 8, 2010

ow to Protect Your Family With Pre-disater Planning - Emergency Preparedness Plan

Mo Plante


There are many steps that can be taken to prevent harm to your family when a disaster strikes. The primary key to ensuring the safety of your family is to plan ahead. While every disaster is different the steps that need to be taken for safety purposes are very similar.A simple cycle will help prepare you and your family for what needs to be done. This cycle includes four easy step, planning, testing, practice, and maintenance.The first portion of this critical cycle is of the utmost important. It is planning an evacuation or reaction plan appropriate for the natural disaster. If a fire was to take place in your home an evacuation plan would be more suitable while if a hurricane was approaching a safety plan directed at the in home safety would prove to be more valuable.For this reason, it is advised that an evacuation plan and severe weather plan be created. A few things to remember when creating your emergency plan is to designate a single location for all the family to seek out when an emergency arises. This will make is easy to account for all family members and help save valuable time in trying to move the family to a safer location.Secondly, this plan needs to be discussed on a regular basis with the whole family to make sure everyone understand the plan and also knows the importance of following the plan and not deviating from it.


Finally, a good way to help refresh younger members of the familys memory is by posting your emergency plans on the refrigerator and in their bedrooms. That way there in a stressful situation when it is time to implement these plans they can easily be located and followed.Before the final plan is put into place, it is important to test the plan and make sure that it is effective and can be accomplished by all family members. This is especially important when smaller children or elderly are within the home. The designed emergency plan should be tested under various pretend emergencies to make sure it is suitable for all major emergencies or to let you know that the plans need to be revised under certain circumstances.Now that the plan has been designed, tested, and ready to be used in case of emergency, it is time to remind all the members of the family of what needs to be done. We never want an emergency to occur, but when it does it is time to get down to business. To make sure there is no delay in family response, a monthly test should be run. This way all the procedures stay fresh in everyone's mind. So when that emergency does occur there is no doubt that everyone knows exactly what they need to be doing.Finally, the last part of the cycle is maintenance.


The portion is just as important as the first. The reason being for maintaining your emergency plans is that sometimes house layouts change, family members switch rooms, or they simply become ineffective.This is also a good time to check those first aid kits and emergency supplies such as bottled water, canned goods, and conditions of the home.An emergency plan should be evaluated annually to make sure you and your family are doing all that they can to stay safe in a state of emergency.This cycle will help keep you and your family safe.Just remember those four easy steps: planning, testing, practicing, and maintenance. Following those rules will make sure your plans are not haphazard and will keep your family safe.Check our site for the tools to protect your self and more Survival InformationSurvival KitsArticle Source: http://EzineArticles.com/?expert=Mo_Plante

Making Bread - With or Without a Mixer


Hooking UP with Show and Tell Friday - be sure and check out all the other great bloggers for this fun event http://romantichome.blogspot.com/2010/05/show-and-tell-friday_13.html


I love to make homemade bread - I haven't always felt that way. Several years ago I made it occasionally, then our daughter developed a soy allergy and I had to start making it all the time. It was ardous when I started. Seemed like it took forever and I would get overwelmed when I did it. I kept experiementing with recipes and finally figured out my own. I simplified and simplified and now I have a great bread recipe, memorized, and it even won a "Gooseberry Cooking Contest." It is a recipe that can be made with or without a mixer.

Step One - Mix
3 Tbsp sugar
1 Tbsp salt
1/4 cup oil
2 cups warm milk or equivalent pwd milk
3 cups white flour (or can do all whole wheat if your tummies are used to it)

  • Note - very important to mix this well - if you get your gluten going you don't have to knead it as much in the next step. This is easy to beat with a spoon if you didn't have a mixer.

  • Step Two
    Mix 1 Tbsp yeast in 1/2 cup warm water
    When dissolved add to above mixture
    • Note mix this in well

    Step Three
    Add 4 cups whole wheat (or white) flour mix until mixed in.

    Step Four
    Cover and place in warm place until raises to double
    Punch down and let raise again
    *Note - this double raising helps it to be really nice and fluffy

    Step Five - Preheat Oven to 425* Grease pans and place dough in pans, let raise until double

    • Note - I put them on the stove covered with a towel while it the oven is heating up to bake the bread

    Bake at 400* for 5 mins/ Then at 375*for 5 minutes/Then at 350* for 20 minutes. If they need to be browner, bake an additional 5 mins at 325*.


    Pull out of oven. Cover with towel for about 10 mins, They should slip right out of a greased pan. Put them in a ziplock bag and seal it for 30 mins. If there is moisture after 30 minutes, wipe it out and reseal.

    • This will make your bread nice and soft. You dont' have to butter the top to keep it soft.
    This is a great recipe and so easy to do. I can mix it up in 5 mins.
    Have a great week!

    Saturday, May 1, 2010

    Cooking with Your Storage Items


    It is vital that we all learn how to cook with the items we have stored. In order to do that we must have a collection of recipes that will work using our storage items.

    Challenge this week for all of us

    Gather your preparedness recipes and look at them to see which ones are really usable for your family and organize them

    1. If there are recipes in your stack of papers that you will never use, get rid of them, clean this out.
    2. Divide them into appropriate categories
    3. Put them in a file folder or binder so they are ready to be used.
    4. You probably have recipes that you use now that can be used. If you don't want to write the entire recipe out, make a list of those recipes and put them in the appropriate section.
    Practice cooking - a few ideas:
    1. If you use a pancake mix, make pancakes from scratch.
    2. Make some granola - it is a great snack or breakfast
    3. Choose a recipe you use that is a ready to eat recipe and adapt it to using your storage items.
    4. One day a week practice cooking a recipe that is totally using storage items so you can see what items you may be missing and your family can get used to the changes.
    Several years ago one of our daughters was diagnosed with a soy allergy. Soy is broken down and bits and pieces of it used all over ready to eat foods - to preserve or extend it. She was allergic not to the whole soy but to the pieces. (25% of Americans are allergic to different degree's). I cut out all ready to use foods, it was amazing! I didn't use that much I didn't think. but it was a major cultural shock for me as the main chef in our house. I had to learn new cooking skills. It was the best thing that happened to me and us preparedness wise as far as cooking with storage.

    Preparedness is something that is easy to put off doing because it isn't an iminent need. BUT when that need comes and you don't have recipes or resources to use, it will add to whatever crisis you may be in.


    So - your assignment this week.....should you choose to accept it.....
    1 - Organize your storage recipes
    2 - Cook one meal with your storage foods - continue this weekly!!!


    Have a great week!

    Wednesday, April 14, 2010

    Solar LIghts

    ( Picture from Article That Follows)
    I heard about a family who was caught in a disaster without any lighting. They had put solar lights on their walkway up to their front door. The person writing the article said they were inside in the pitch black and there was a glow of light coming in their living room window - when they investigated it was their solar lights. They promptly brought them in their house and used them until their lights came back on.
    It had crossed my mind to use my outdoor solar lights, but I hadn't ever tried them. So after reading this, I turned off my lights and retrieved some of them. They aren't as bright as a lantern or a candle, but they would be a wonderful thing to have as a back up when your other resources were spent. The light isn't really bright but you can see where you are going especially if otherwise it is pitch black!

    I have seen a few sales on them with the spring gardening items, so it would be a good time to invest n them. You can even use them to help with lighting outside right now! I have solar lights that are 5 years old and still shining bright at night.
    ~~~~~~~~~~~~~~~~~~~~~~~
    Here is an article about them:
    Outdoor solar lights uses the identical action to generate power as the solar panels on your ceiling (or that you could set up on your ceiling, if you selected to). Essentially, it applies photovoltaic (PV) cells, which accumulate and switch solar energy into electrical energy. The PV cells apply semiconducting materials to engage the sun’s light, which interacts with the silicon and another components to produce electrical energy. The electrical energy runs over cables which power the battery, which in go powers the light. This is an highly simple explanation, but it will present you the common idea of how solar cells play. They can only make electrical energy from direct sunshine, which is why solar lighting wants a battery in order to be able to light up the dark.
    So that the batteries to keep a constant charge, the solar light fixture should be in a position that meets full sunshine for almost of the daylight. If it just gets partial sunlight, because it’s barred by trees or other construction, or because your area has much of cloudy conditions, the batteries will run out earlier, and your fixture will supply light for a lower amount of time. Most outdoor solar lights fixtures own a backup power system which applies rechargeable batteries. Solar lights fixtures which apply a small amount of electrical energy frequently apply small AA Ni-Cad or NiMh batteries. But more strong solar lights fixtures (like head lights) apply a covered lead acid battery.
    Photo detectors that automatically evaluate light degrees (like the kind that tells your photographic camera when to apply its flash) are constructed into the solar lights fixtures. They monitor light degrees and turn the fixture off at morning and on at nightfall. But get sure there are no artificial light sources (like a street lights or head light) that may contribute a wrong reading and forbid the light from turning on.
    Outdoor solar lights usually utilizes LED bulbs. They apply less power than incandescent bulbs and, with a lifetime of around 20 years, are much longer-lasting. Until lately, solar lights overall has not been as bright as lighting powered straight by direct current electrical energy. But the earliest super bright LEDs can at present illuminate as well as halogen bulbs. http://solarlighting-s.com/outdoor-solar-lights/

    Waxed Cheese

    Information coming.....

    Saturday, April 3, 2010

    90 Days of Lunch

    Other things can be made from these items - need these basic supplies to work with.)

    7 Menu's
    1 - Soup/Sandwiches(Tuna or other canned meat)/Milk or Water/Veggies
    2 - Chile/Toast/Juice
    3 - Grilled Cheese Sandwiches/Veggies/Soup
    4 - Soup/Sandwiches(Tuna or other canned meat)/Milk or Water/Veggies
    5 - Chile/Toast/Juice
    6 - Grilled Cheese Sandwiches/Veggies/Soup
    7 - Chile/Toast/Juice

    4 soups a week x 12 = 48 cans or 2 cases
    3 chile or other type canned meal such as stew etc x 12 = 36 cans or case and 1/2
    Canned Tuna or other canned meat - 2 per week x 12 = 24 cans
    Grilled Cheese - 1 lbs a week (waxed cheese - 1 lb a week x 12 = 12 lbs
    Veggies - in season - use garden/ out of season, sprouts or canned - 4 meals x 12 = 48 cans or 2 cases
    Bread Makings for each day = 3 loaves for the week (see breakfast for item list)
    Fruit Juice - 3 times = 1 bottle of 64 oz per day ( 64 oz = 8 cups) (need fruit juice for nutrition not just a drink mix) = 3 x 12 = 36 bottles or 3 cases (12 in a case)

    Saturday, March 27, 2010

    Doing a 90 Day Meal Plan - BREAKFAST


    It has been suggested that we get not only long term storage, but a three month supply as well. this is what is said in the Family Home Storage Pamphlet - a full copy is at http://www.providentliving.org/ .

    THREE-MONTH SUPPLY
    Build a small supply of food that is part of your normal, daily diet. One way to do this is to purchase a few extra items each week to build a one-week supply of food. Then you can gradually increase your supply until it is sufficient for three months. These items
    should be rotated regularly to avoid spoilage.


    In our family meeting in March this was one of the items discussed. I was in charge of this part so I made up 90 days of menu ideas. In this post I am sharing my breakfast menu ideas.

    I made up a list of 7 menu's and I figured out how much would be needed per meal then times that out by 12. These menu's aren't set in stone, but they do give me the needed supplies to make a wide variety of breakfast menu's as long as I have the basic supplies.

    Right now this is for 3 people who are here at the house living. Obviously it would need to be adjusted if more or less are living here!

    Oatmeal or Hot Cereal/Toast/Fruit/Milk (2 times per week)
    3 boxes of oatmeal, one box powdered milk or evaporated milk, 1 carton honey, dried fruit, bread supplies***
    Pancakes/Tang Drink or Juice/Fruit (2 times per week)
    2 boxes complete mix, 2 bottles syrup, 1 container tang, 12 pints canned peaches
    Cold Cereal/Toast/Yogurt/Tang
    6 boxes cold cereal, 1 package rennet, 1 box powdered milk, canned or dried fruit for yogurt, 1 pkg tang
    Breakfast or Coffee Cake/Hot Chocolate/Fruit
    12 packages muffins to make into cake or br. cake supplies, 12 dried or 12 pints canned fruit, 6 packages hot chocolate
    Muffins/Canned Ham or Bacon/Hasbrowns/ Hot Chocolate
    12 pkg ready to mix muffins, 12 cans meat, 1 pacakge dried hashbrowns, 6 packages hot chocolate, use meat fat to cook hashbrowns

    TOTAL:
    24 pkg muffin mix
    12 cans meat
    24 pints canned fruit or dried fruit equivalent
    12 pkg hot chocolate
    2 pkg Tang
    2 pancake mix boxes
    2 bottles syrup
    6 boxes cereal
    3 boxes oatmeal (or instant equivalent)
    1 box powdered milk
    1 pkg rennett
    1 carton honey
    1 gallon package dried hashbrowns
    Bread making supplies includes for 2 loaves of bread a week for breakfast meal (Other meal amounts with that respecitve meal - not every breakfast meal has bread)
    8 cups flour per week = 32 cups = 16 lbs.
    1/2 cup pwdered milk reconstituted into 2 cups = 2 cups powdered (add to milk above)
    1/4 cup oil x 4 = 1 cup
    1 tbsp salt x 4 = 4 Tbs
    3 Tbsp sugar x 4 = 12 = 1 cup
    1 tbs yeast x4 = 4 tbsp

    Saturday, March 20, 2010

    Solar Cooking


    I have been studying about new methods of solar cooking. I realized I need to know this skill much better than I do. I pretty much just dabble with it and I need to know it as a skill.

    When doing research I came upon this blog by "Sloar Oven Chef" she started last year and cooking everyday it is sunny in her solar oven. This is about her journey - her successes and failures. She shares what she learned from the failures. It is a great read.
    http://solarovenchef.blogspot.com/

    This site explains how to make a solar oven from a windshield shade that is pictured above:
    http://www.solarcooking.org/plans/windshield-cooker.htm

    I have learned alot, still have more research to do on this...most important is I need to practice.
    I am in Idaho and the weather is pretty finicky right now, but when it levels out, I am going to cook every sunny day this summer, so I can learn how to do this.

    Saturday, March 13, 2010

    Organizing Non Food Items

    My Herb Storage Shelf
    We have a bathroom in our basement that is huge - not sure why it ws made that way, but it is bigger than any bathroom in the house and all it has is a potty and a sink. There are lots of shelves there so I use it for our non food storage. As I am deep cleaning our house my number one goal is to get it all put together so the preparedness items are available to use. I have had things all over the house. So I put in the repective area's a couple bars of soap and the rest in the storage area, two tubes of toothpaste in each bathroom and the rest in storage. I have a better idea of what we have and what we need.

    One thing I do as far as inventorying our food is once a case is opened it is off the food storage list and added to the "need to buy" list. I just adapted that to the non food as well.
    To have a successful food storage you need to have a system of inventory that works for you.

    Tuesday, March 9, 2010

    Self Reliance and Gardening


    It seems like people are thinking about things a lot differently in today's economy than they have in the past. Self reliance has become a hot topic all of a sudden. Instinctively people know that we can't depend on the government or any other organization to just 'take care of us'. We must take the initiative to provide for our families and be prepared to provide for them NO MATTER what happens in our communities. One of the most important ways to be self reliant is to be able to grow your own food.

    Shocking was the response of a 3rd grade girl to the question her teacher asked her, 'Where do vegetables come from?' She replied, 'The store'. There are many children who don't even know the plants that vegetables and fruits come from!

    Education is the first step, but there is another relevant problem: The Growing Season.

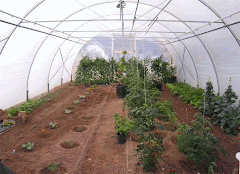
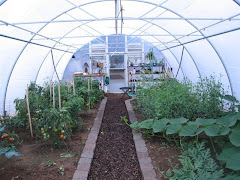
    I live in Idaho which means our last frost happens about Memorial Day and our first one in the fall is about Labor Day - that gives me 3 months to garden. Depending on your climate zone, most likely you won't always be able to grow food whenever you want. So we must go to battle with Mother Nature! The solution to be able to grow food year round is simple: a greenhouse. A greenhouse is something I am adding to my supplies this summer. I am so excited about it. I am learning about "greenhouse gardening" and add this to my preparedness skills.


    As I have done the research and studied I have found there are so many benefits of owning a greenhouse, here are a few:
    1. Grow food year round. No matter what your zone is you can produce year round. Many greenhouse owners have extended their growing season from just July and August to March - November without any heat supplement. What a huge difference!

    2. Grow in any climate conditions. In a greenhouse YOU control the environment, not Mother Nature.

    3. Added benefit for your family. A family who works and plays together stays together. Teaching, working and having fun in a greenhouse provides for added stability in your children. It also teaches them that vegetables do not come from the store. This is a video about greenhouse gardener's talking about the benefits to their families HERE
    4. Basic Skills. Being self reliant also means that you have the skills necessary to survive in various situations. Knowing you have a method to provide food for your family, no matter the current conditions, decreases your stress level.

    5 - Decrease in stress. Let's get real, digging in the dirt while in a warm greenhouse, even if the temperatures outsid are cold, heals anyone's stress level!

    So next Christmas when I get to go out to my greenhouse and pick tomatoes and lettuce for our dinner, just wave at me as you drive by - well really slide by - I live in Idaho!

    For more info on the greenhouse I am using you can e-mail brent@tuffgreenhouses.com

    ALTERNATIVES FOR ELECTRICAL APPLIANCES AND TOOLS


    This is a great list - the website is at the bottom of the article.
    Electric can openerManual can opener
    Manual wall mounted can opener
    GI K-9 emergency can opener
    Pocketknife can opener blade
    Blender
    Wire whisk
    Martini shaker
    Egg beaterKnife
    Food chopper
    Handcrank blender
    Rechargeable portable blenderElectric mixerWire whisk for thin batters
    Large wooden spoon for thicker batters
    Egg beater for whipping
    Hand crank mixerBread mixer or bread machineStrong arms and hands!
    Hand crank mixer
    Food processor
    Knife
    Mandolin
    Grater
    Pastry blender
    Two tableknives
    Wire whisk
    Egg beater
    Food chopper
    Knife
    Manual food processor
    CrockpotSolar oven
    Norwegian stove
    Wonder Box
    HayboxP
    ropane slow cooker
    Toaster
    Campfire or stove top toaster
    Campfire forks
    Egg cookerSaucepan of water
    Solar oven
    Add a poaching insertGrain mill
    Manual grain mill
    Coffee grinder (for small amounts)
    Popcorn popper
    Campfire popcorn popper
    Stove top popcorn popper
    Waffle ironCampfire waffle iron
    Stove top waffle iron
    Sandwich maker
    Camp cooker or pie iron
    JuicerReamer
    Hand juicer
    Citrus press
    Refrigerator
    Cooler with ice
    Portable thermo electric cooler
    Portable gas refrigerator
    Propane, natural gas or kerosene refrigerator
    Solar electric refrigerator
    Cool gardie safe or bamboo iceless refrigerator
    Pot-in-pot refrigeratorCold streamRoot cellar
    Stove/oven
    Gas stove/oven/rangeL
    iquid fuel camp stove
    Portable collapsible oven
    Propane camp oven
    Lantern cooker
    Gas or charcoal grill
    Dutch oven
    Wood burning fireplace
    Solar oven
    Canned heat stove
    Tin can stove
    Butane, propane or kerosene stove
    Chafing dish
    Propane skillet
    Apple Box oven
    Rocket stove
    Dishwasher
    Hot water and soap
    Garbage disposal
    Compost pile
    Domesticated animals
    Iron
    Sad iron (heavy metal iron heated by another source)
    Butane iron
    Clothes washer
    Washboard and tub
    Washing plunger and tub
    Pressure hand washer
    Clothes dryer
    Clothesline
    Drying rack
    Sewing machine
    Needle and thread
    Treadle sewing machine
    Vacuum cleaner
    Broom and dustpan
    Dust mop
    Floor sweeper
    Electric razor
    Safety razor
    Strap razor
    Electric toothbrush
    ToothbrushStick with shredded endFinger
    Curling iron
    Butane curling iron
    Hair rollersBlow dryerCordless hair dryer (still in patent approval)
    Alarm clock
    Battery operated clock
    Wind-up clock
    Doorbell
    Door knocker
    Manual door bell
    Computer/word processor/printer
    Pen, pencil and paper
    Manual typewriter
    Electric typewriter
    Pen, pencil and paper
    Manual typewriter
    Electric pencil sharpener
    Small knife
    Hand held pencil sharpener
    Manual schoolroom pencil sharpener
    Wireless telephoneLand line telephone
    Fan
    Battery operated fan
    Hand operated fan
    Hand held fan
    Wind blowing through wet sheets
    Television
    Books
    Games
    Battery operated television w/car adaptor
    Radio
    Battery powered radio
    Hand crank radio
    LightsCandles and matches
    Flashlight and batteries
    Hand crank flashlightLantern – battery powered, oil, propane, kerosene, candle, gas
    Lamp –
    oil, paraffin, kerosene
    Battery recharger
    Solar battery rechargerCell phone chargerDisposable charger
    Battery operated charger
    Hand crank charger
    Solar charger
    Car charger
    Water heater
    Any stove
    Portable solar shower bag
    Heater
    Fireplace
    Wood burning (or other fuels) stove
    Propane or kerosene room heater
    Extra clothes and blankets http://www.simplyprepared.com/alternatives_to_electrical_appliances_and_tools.htm

    Saturday, March 6, 2010

    Inventory First Aid Items

    We had a first aid mini emergency this week and I realized I need to replace a few items in my kit and in my supplies. I need to get some more vaseline, some anti-gas treatment, and some kind of diaper rash ointment. I also have added cleaning out my supplies to my "To Do" list next week.
    Here is a great First Aid Kit Resource Article:
    First Aid Kit Supplies
    By Rachel Woods, About.com Latter-day Saint Guide, http://lds.about.com
    Your basic emergency/home storage should include a prepared kit of first aid supplies.
    Notes:
    • Update your first aid kit every six months (put a note in your calendar/planner) to
    replenish and check all supplies. Expired or contaminated items should be replaced.
    • Check with your family doctor for any specific medicines and supplies your family
    might require for an emergency.
    • Some items may leak or break open. Using tubes, plastic bottles, or Ziploc bags can
    help prevent contamination.
    • All supplies should be labeled and organized for quick and easy use.
    • Supplies may be divided and organized into compartments or sections.
    • You may include any other first aid items you feel would be useful or necessary.
    • A condensed version of this first aid kit should also be included in your 72 hour kit.
    *List compiled from, “Essentials of Home Production & Storage,” 1978, p 7-8.

    Standard First Aid Kit Supplies*
    ı Container (metal, wood, or plastic) with
    a fitted cover to store first aid kit
    ı First Aid Booklet (including CPR)
    ı Prescribed Medications
    ı Any critical medical family histories
    ı Adhesive
    ı Ammonia
    ı Bicarbonate of soda
    ı Calamine lotion (sunburn/insect bites)
    ı Diarrhea remedy
    ı Elastic bandages
    ı Gauze bandages
    ı Hot-water bottle
    ı Hydrogen peroxide
    ı Ipecac syrup (induces vomiting)
    ı Knife
    ı Matches
    ı Measuring cup
    ı Medicine dropper
    ı Needles
    ı Paper bags
    ı Razor blades
    ı Rubbing alcohol
    ı Safety pins
    ı Scissors
    ı Soap
    ı Thermometer
    ı Triangular bandages
    ı Tweezers
    ı Prescriptions
    ı Consecrated oil


    Additional First Aid Kit Supplies
    ı Immunization records
    ı Medications for children (if applicable)
    ı Fever reducing medications such as:
    -aspirin, acetaminophen, or ibuprofen
    ı Allergy medication
    ı Antibacterial wipes
    ı Antibiotic ointment
    ı Antiseptic wipes
    ı Band-aids
    ı Burn ointment/spray
    ı Cotton balls
    ı Cough syrup/cough drops
    ı Disposable blanket
    ı Eye drops/eye wash
    ı Feminine Hygiene
    ı Gloves
    ı Hand sanitizer
    ı Hot and cold instant packs
    ı Hydrocortisone cream
    ı Lip ointment (chap stick)
    ı Medical tape (waterproof & regular)
    ı Nail clippers
    ı Needle and thread
    ı Snake bite kit
    ı Sterile strips
    ı Sunscreen/lotion
    ı Tourniquet kit
    ı Vaseline
    ı Water purification tablets
    ı Other:

    My Preparedness Information is Organized! WOO HOO

    This week I have totally taken all of my preparedness paper's, handouts. books, personal research etc. and organized it. I had duplicates of many things and am giving that all away.
    I have sections for food, recipes, disaters, skills, etc. I have enough information that it filled a file drawer. I am working on my herb book now, getting it organized and in working order.
    Now I can clearly see what I need to work on, what herbs and garden seeds to plant and what skills I need to learn.....so my challenge to you is to get your information in working order!

    Saturday, February 27, 2010

    Earthquake - Your Children


    Today this is on everyone's mind as we have seen the pictures coming out of Chile. Our prayers and concers are with these people.

    When it comes to EQ preparedness I don't know if we can ever be totally prepared, but there are things we can do ahead of time to help if this happens to us and our families.

    When I was about 5 we lived in Salt Lake City, Utah. There was a huge earthquake. I remember trying to get to my mom's room. It was quaking so hard that by the time my brother and I reached the hallway that we were being thrown from wall to wall. My mom yelled to us to lay down. We did that until the shaking finished.
    I would suggest if you have children to talk to them about what they do during the earthquake specifically. Let them practice it. Make it a fun night so they aren't scared. Going through this as a child and knowing the terror this created I know how little kids just try to get to their parents. We never talked about earthquakes and what to do if there was one and it was terrifying. If we had talked about it, I would have better known what to do.

    Thursday, February 25, 2010

    What I Am Doing This Week ----Family Preparedness Organization

    Since there isn't alot going on in our area with preapredness we decided as a family to make our own family preparedness organization. I am sharing how we have organized this to help give you some ideas and hopefully some motivation to do this if you aren't already. I can't get the table to come up so it won't be listed as one sorry!

    Please look the months and see which months you have an assignment.
    You have 15 minutes to cover whatever part of this you want to do. For example - Dad on Water - he can spend one time talking about purifying water, one time on how to find it if you don't have any on hand, one time on rotation and how to store, etc.
    Your food assignment you do as a couple if you wish. You have 10 minutes to cover whatever info you want. You can send out e-mails, recipes, whatever you chose to do for your food area.
    The meeting will be 60 minutes on Fast Sunday at 6:30 our time after dinner.
    I will send you the number for the call on March 6. We will use this number each month if you aren't able to be here.
    FYI - This first time the people who have an assignment are: Mesha, Ben, Kalea, and Mom/Dad.

    Agenda:
    · 15 minutes on each topic (45 minutes)
    · 10 minutes on food for the month
    · 5 minutes on questions that haven't been answered

    DAD - Water - storage, gathering, purifying, rotation, etc.
    MOM - Food - General Info - Storage, amounts, perserving, how to store, menu's, refrigeration,
    MOM - Specific Disaters/Clothing/Boots/Sewing/- warmth, boots, repairs, protection etc. (Jonathan's wife will take this spot (wink wink)
    BEN - Defense - guns, skills, knives, strategy, etc. BEN
    KALEA - Moral - games, activities, conflict, books, etc. KALEA
    BRENT - Transportation - physical condidtion. bikes, walking, repairs, cars etc.
    ANDREA - Shelter - tents, bedding, tarps, etc.
    JEFF - Sanitation /Personal Care/- soap, teeth, hair, - TP, Toilet, Washing etc etc.
    MESHA - 1st Aid - Kit, knowledge, CPR etc.
    JONATHAN - Heating/Lighting -
    CASEY ? Obtaining Food – hunting/fishing and equipment
    SHAYLA- Cooking

    March
    1st Aid Mesha
    Defense Ben
    Moral Kalea
    Grain Mom/Dad

    April
    Cooking Shayla
    Food Misc. Mom
    Pers/San Jeff
    Oil Andrea/Brent

    May
    Disaster/Clothing Mom
    Transportation Brent
    Shelter Andrea
    Milk Mesha/Jeff

    June
    Heat/Light Jonathan
    Obtain Food Casey
    Water Dad
    Sugar Kalea/Ben

    July
    1st Aid Mesha
    Defense Ben
    Moral Kalea
    72 Hour Kits Shay/Casey

    Aug
    Cooking Shayla
    Food Misc. Mom
    Pers/San Jeff
    Beans Jonathan

    Sept
    Disaster/Clothing Mom
    Transportation Brent
    Shelter Andrea
    Leavener/Salt Mom/Dad

    Oct
    Heat/Light Jonathan
    Obtain Food Casey
    Water Dad
    Spices Andrea/Brent

    Nov
    1st Aid Mesha
    Defense Ben
    Moral Kalea
    Meat Mesha/Jeff

    Dec
    Cooking Shayla
    Food Misc. Mom
    Pers/San Jeff
    Moral Boosters Kalea/Ben

    Jan
    Disaster/Clothing Mom
    Transportation Brent
    Shelter Andrea
    Vitamins Shay/Casey

    Feb
    Heat/Light Jonathan
    Obtain Food Casey
    72 Hour Kits - Jonathan