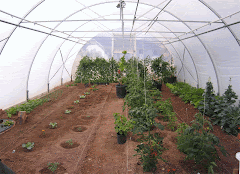
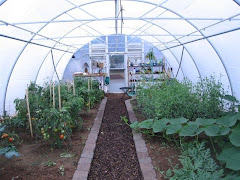
I am harvesting things out of my garden - here are the instructions for squash.
Cut it up and clean out the seeds, then cook it for 40 min. at 375 with the skins on. Let it cook and then put it in freezer bags and freeze it, I usually put four pieces in a gallon size freezer bag.
Thursday, August 20, 2009

Friday, July 10, 2009
3 Month Supply
I know there is lots of talk right now about the swine flu and the possiblities that it could bring. So I am offerening you a challenge -
Could you right now live in your house for 3 months without going out to purchase products, to be entertained or to get some exercise, diversion etc.? What would it take for you to do this?
Please take some time to start thinking about this right now.
~*~*~*~*~*~*~*~
Could you right now live in your house for 3 months without going out to purchase products, to be entertained or to get some exercise, diversion etc.? What would it take for you to do this?
Please take some time to start thinking about this right now.
~*~*~*~*~*~*~*~
I am In the Garden

Our summers are so short - when the sun shines we are all outside.
Click here to jion me in my garden!
Wednesday, April 1, 2009
CROCK POT YOGURT - IT WORKS!
I have a yogurt maker but it has always been so complicated, I have to feel really motivated to do it. I tried Debbies recipe - listed at the bottom of the blog and it is great! I just blended my home canned peaches from last fall with a cup of it and it is like eating Ice Cream YUMMM!
Tuesday, March 31, 2009
Food Storage For 1 For a Year
I just got this from a friend and would love to know the original author so I can give the proper credit where it is due. 
Some people try to rationalize that we "really" don't need to store everything that we have been asked to store. The thought came to actually create a display to show 1) what does that one year basic survival food for one person look like (the amounts the First Presidency has recommended), and 2) how much does that really work out to be per day?
~*~*~*~*~*~
Exactly What Does a Basic 1 Year Food Storage
For 1 Person Look Like?
These are the MINIMUM Basic Amounts of Food Needed for Survival for ONE PERSON for ONE YEAR: BARE-MINIMUM LDS Church Food storage requirements for 1 adult male for 1 year Appx. 2,300 calories per day. (only 695lbs total)
Some people try to rationalize that we "really" don't need to store everything that we have been asked to store. The thought came to actually create a display to show 1) what does that one year basic survival food for one person look like (the amounts the First Presidency has recommended), and 2) how much does that really work out to be per day?
We took all those ingredients and by adding yeast (which we know is not on the basic list – but hopefully we have stored), we were able to make one loaf of bread and 1/3 cup of beans. That would be your food for the entire day.
Don't FORGET water!!!
Don't FORGET water!!!
Saturday, March 28, 2009
Yogurt in a Crock Pot
Great instructions in resource articles below to make your own Yogurt - great instructions for preapredness resource - make your own crock pot - I will find the instructions for that and add it. I have done it before and it works!
Great Crock Pot Yogurt
Great Crock Pot Yogurt RecipeThis is Very Awesome!Homemade Yogurt in a Crock Pot--8 cups (half-gallon) of whole milk--pasteurized and homogenized is fine, butdo NOT use ultra-pasteurized. (Debbie recommends starting with whole milk until you get the hang of yogurt-making)--1/2 cup store-bought natural, live/active culture plain yogurt (you need tohave a starter. Once you have made your own, you can use that as a starter)--frozen/fresh fruit for flavoring--thick bath towelThe DirectionsThis takes a while. Make your yogurt on a weekend day when you are home tomonitor. I used a 4 quart crockpot. This is so exciting. My fingers are shaking! Plug in your crockpot and turn to low. Add an entire half gallon of milk. Cover and cook on low for 2 1/2 hours. Unplug your crockpot. Leave the cover on, and let it sit for 3 hours.When 3 hours have passed, scoop out 2 cups of the warmish milk and put it in abowl. Whisk in 1/2 cup of store-bought live/active culture yogurt. Then dump the bowl contents back into the crockpot. Stir to combine.Put the lid back on your crockpot. Keep it unplugged, and wrap a heavy bath towel all the way around the crock for insulation.Go to bed, or let it sit for 8 hours.In the morning, the yogurt will have thickened--- it's not as thick as store-bought yogurt, but has the consistency of low-fat plain yogurt.Blend in batches with your favorite fruit. I did mango, strawberry, and blueberry. When you blend in the fruit, bubbles will form and might bother you. They aren't a big deal, and will settle eventually.Chill in a plastic container(s) in the refrigerator. Your fresh yogurt will last 7-10 days. Save 1/2 cup as a starter to make a new batch.The Verdict.Wowsers! This is awesome! I was completely astonished the next morning that the yogurt thickened. I was so excited to feel the drag on my spoon. You can add honey for sweetening. This is so much more cost-effective than the little things of yo-baby I was buying.To thicken the best, add one packet of unflavored gelatin to the mix after stirring in the yogurt with active cultures. Some have had good success mixing non-fat milk powder in as well. The way I created fruit-flavored yogurt was by taking a cup or so of the plain and blending it in the stand blender (vitamix) with frozen fruit. Although this tastes great, the yogurt never thickened back up the way the plain did. I think maybe keeping the plain separate and adding fruit daily is your best bet. Or you can try the gelatin trick.I was able to achieve a Greek-style yogurt this afternoon by lining a colander with a coffee liner and letting the liquid drip out of the leftover plain I made. The remaining yogurt was as thick as sour cream. I do not know how this will work with soy milk and soy yogurt or rice milk and rice yogurt. I'd imagine it would work similarly, but I haven not tested this out.Article found at: Crockpot365. blogspot. com/2008/ 10/you-can- make-yogurt- in-your-crockpot .html
Great Crock Pot Yogurt
Great Crock Pot Yogurt RecipeThis is Very Awesome!Homemade Yogurt in a Crock Pot--8 cups (half-gallon) of whole milk--pasteurized and homogenized is fine, butdo NOT use ultra-pasteurized. (Debbie recommends starting with whole milk until you get the hang of yogurt-making)--1/2 cup store-bought natural, live/active culture plain yogurt (you need tohave a starter. Once you have made your own, you can use that as a starter)--frozen/fresh fruit for flavoring--thick bath towelThe DirectionsThis takes a while. Make your yogurt on a weekend day when you are home tomonitor. I used a 4 quart crockpot. This is so exciting. My fingers are shaking! Plug in your crockpot and turn to low. Add an entire half gallon of milk. Cover and cook on low for 2 1/2 hours. Unplug your crockpot. Leave the cover on, and let it sit for 3 hours.When 3 hours have passed, scoop out 2 cups of the warmish milk and put it in abowl. Whisk in 1/2 cup of store-bought live/active culture yogurt. Then dump the bowl contents back into the crockpot. Stir to combine.Put the lid back on your crockpot. Keep it unplugged, and wrap a heavy bath towel all the way around the crock for insulation.Go to bed, or let it sit for 8 hours.In the morning, the yogurt will have thickened--- it's not as thick as store-bought yogurt, but has the consistency of low-fat plain yogurt.Blend in batches with your favorite fruit. I did mango, strawberry, and blueberry. When you blend in the fruit, bubbles will form and might bother you. They aren't a big deal, and will settle eventually.Chill in a plastic container(s) in the refrigerator. Your fresh yogurt will last 7-10 days. Save 1/2 cup as a starter to make a new batch.The Verdict.Wowsers! This is awesome! I was completely astonished the next morning that the yogurt thickened. I was so excited to feel the drag on my spoon. You can add honey for sweetening. This is so much more cost-effective than the little things of yo-baby I was buying.To thicken the best, add one packet of unflavored gelatin to the mix after stirring in the yogurt with active cultures. Some have had good success mixing non-fat milk powder in as well. The way I created fruit-flavored yogurt was by taking a cup or so of the plain and blending it in the stand blender (vitamix) with frozen fruit. Although this tastes great, the yogurt never thickened back up the way the plain did. I think maybe keeping the plain separate and adding fruit daily is your best bet. Or you can try the gelatin trick.I was able to achieve a Greek-style yogurt this afternoon by lining a colander with a coffee liner and letting the liquid drip out of the leftover plain I made. The remaining yogurt was as thick as sour cream. I do not know how this will work with soy milk and soy yogurt or rice milk and rice yogurt. I'd imagine it would work similarly, but I haven not tested this out.Article found at: Crockpot365. blogspot. com/2008/ 10/you-can- make-yogurt- in-your-crockpot .html
Monday, March 23, 2009
Zeer Pots
My friend Mala sent me this great link for "Zeer Pots." It is a method to keep things cool without refridgeration. http://standeyo.com/NEWS/09_Food_Water/090320.zeer.pots.html
Saturday, March 7, 2009
Food Storage Friday - March 6

This week I am still working on my garden plans.
I bought seeds this week.
I received a newsletter from a local nursery that stated for the first time in 27 years gardening is making a huge comeback and they can't keep in their garden seeds. I decided I better to and get mine. I usually do it in March anyway because I have spring fever by then and it is fun to be in a nursery. I tried to find some herilom seeds because I plan to harvest seeds this fall.
I bought seeds this week.
I received a newsletter from a local nursery that stated for the first time in 27 years gardening is making a huge comeback and they can't keep in their garden seeds. I decided I better to and get mine. I usually do it in March anyway because I have spring fever by then and it is fun to be in a nursery. I tried to find some herilom seeds because I plan to harvest seeds this fall.
We are in zone 4 so we have warm weather crops and cold weather crops.
The things that will be planted first (sometime in April are:Peas, lettuce, beets, radish, carrots, onions, etc.
The things that will be planted first (sometime in April are:Peas, lettuce, beets, radish, carrots, onions, etc.
The warm weather crops are things like corn, beans, squash, pumpkins, zucchini, and things I buy that are started like peppers and tomoatos.
I like to dry some of these things so I get extra to do that. I also get an extra bag for next year and tuck it in my basement. I also have a can of heirloom seeds that are canned in case of survival situations.
I like to dry some of these things so I get extra to do that. I also get an extra bag for next year and tuck it in my basement. I also have a can of heirloom seeds that are canned in case of survival situations.
Friday, February 27, 2009
FOOD STORAGE FRIDAY - February 27

I have been planning our garden and yard this past week. I love this time of year to look at seed magazines and decide what is happening in our little garden.
For Food Storage Friday I have been studing what type of herbs I want to plant and that can live in a zone 4. Here is my list so far:
Basil - bite pain, cramps, nausea, indigestion, headache, fever, calmative
Dill - sedative, insomnia, gas, cramps,stress
Marjoram - nausea, toothache, sprains, joints
Mullein - skin irrations, burns, antiseptic
Parsley - blood sugar, bites, swelling, nerves
Peppermint - headaches, antiseptic, sinus/bronchial congestion. digestion, gas
Sage - depression, yeast or blood infection, congestion, diarhea, fever
Plants
Alfalfa - minerals, detox, builds blood, joints, diuretic (May plant along outside fence area)
Cayenne Peppers - antiseptic, sore throat, bleeding, ulcers, pain
Onion - sprins, respirtory congetsion, diabetes
Garlic - antibiotic, anti viral,adust blood pressure,
Dandelion - digestion, liver, blood sugar
There are other plants as well, but they can't be grown here, so I will need to either have ahouse plant or stock up on the herb.
Aloe Vera - speeds healing, antispetic, digestion, burns, skin ailments
Cinnamon - antibiotic, antiviral, antifungal, diabetes, ulcer, nausea, ulcers, cramps
Cloves - toothache, nausea, gas, mild depression, insect repellent
Ginger - great to take baths in when sick
Nutmeg - diarhea
Oats - nervous exhaustion, depression, shingles, eczema
Olive Leaf - antibiotic,anti viral, enerby, lower blood pressure
Thursday, February 12, 2009
Headed for St. George, Utah
 This weekend our #2 daughter is blessing our #3 grandson. We are leaving snowy Idaho to find the sun! It is 14* right now here and 43* there. I post again on February 23. See you next week!
Sunday, February 8, 2009
FRIDAY - Disaster Education - Brush Fires in Australia

This article is from a friend in Australia. It is tragic. It gives you a feel for the situation and how fast something like this happens. I always think this information is good to tuck in the back of my mind to recall if I ever need it to keep my family safe.
The end of the world reached the Victorian mountain town of Kinglake on Saturday, February 7.
Burnt out cars, many containing charred bodies, litter the road leading up to the town which now consists of a handful of still standing shops and hundreds of blackened piles of ash which used to be home to Kinglake's 1,500 residents.
As Victoria burnt on Saturday, a raging inferno raced through the state's central highlands, killing at least 12 in Kinglake itself and 10 in Kinglake West, leaving the once-idyllic community a charred ghost town.
Among the tragic stories to emerge from Kinglake were of a young boy and a girl burnt alive inside their home.
"The kids perished, their mother got out but she couldn't get the kids out," Kinglake resident Mary-Anne Mercuri told AAP.
Ms Mercuri also spoke of sisters in their 20s whose bodies were found in the front of their rented house.
"Two young girls around the corner from me were found in the front of their house. There's no way they could have got out. They would have tried to escape but there was nowhere to go."
The mother-of-three said that when the fire arrived it felt like exploding red burning bullets were being shot horizontally at them.
"These big burning chunks started falling from the sky, there was a lot of power behind them. I guess they were exploding parts of trees," Ms Mercuri said.
"We are lucky to be alive."
Her friend, Mandy Darkin, described the terrifying moment the fire arrived at Kinglake without warning.
"I was working at the local restaurant and we were all carrying on like nothing was going on but then word came that we should go home," the mother of five said.
"Soon after, I looked outside the window and said: `Whoa we are out of here, this is going to be bad'.
"I could see it coming. I just remember the blackness and you could hear it, it sounded like a train.
"I raced home in my car, straight into the driveway, placed all the kids in the house and within two minutes it was here and it was as dark as midnight at 4.30pm."
The 25km journey by road from Whittlesea to Kinglake is a cross between a trip into a war zone and a natural disaster zone.
The typical sunburnt landscape of southeast Australia gives way to a fire-burnt one with black scorched trees and earth.
Property after property is destroyed, burnt out cars line the side of the road, some sit stranded in the middle of the street, while a dead horse, carcass still smouldering, blocks the sporadic traffic.
The remains of two cars which collided head-on in their frantic bid to escape the blaze lie mangled on the road, and a five-car pile-up reveals the desperation of residents fleeing for their lives when the fire arrived.
It is believed six bodies were found in one car.
A media convoy being escorted to Kinglake was delayed at one stage as emergency crews removed another body from one of the burnt-out cars.
As Victoria burnt on Saturday, a raging inferno raced through the state's central highlands, killing at least 12 in Kinglake itself and 10 in Kinglake West, leaving the once-idyllic community a charred ghost town.
Among the tragic stories to emerge from Kinglake were of a young boy and a girl burnt alive inside their home.
"The kids perished, their mother got out but she couldn't get the kids out," Kinglake resident Mary-Anne Mercuri told AAP.
Ms Mercuri also spoke of sisters in their 20s whose bodies were found in the front of their rented house.
"Two young girls around the corner from me were found in the front of their house. There's no way they could have got out. They would have tried to escape but there was nowhere to go."
The mother-of-three said that when the fire arrived it felt like exploding red burning bullets were being shot horizontally at them.
"These big burning chunks started falling from the sky, there was a lot of power behind them. I guess they were exploding parts of trees," Ms Mercuri said.
"We are lucky to be alive."
Her friend, Mandy Darkin, described the terrifying moment the fire arrived at Kinglake without warning.
"I was working at the local restaurant and we were all carrying on like nothing was going on but then word came that we should go home," the mother of five said.
"Soon after, I looked outside the window and said: `Whoa we are out of here, this is going to be bad'.
"I could see it coming. I just remember the blackness and you could hear it, it sounded like a train.
"I raced home in my car, straight into the driveway, placed all the kids in the house and within two minutes it was here and it was as dark as midnight at 4.30pm."
The 25km journey by road from Whittlesea to Kinglake is a cross between a trip into a war zone and a natural disaster zone.
The typical sunburnt landscape of southeast Australia gives way to a fire-burnt one with black scorched trees and earth.
Property after property is destroyed, burnt out cars line the side of the road, some sit stranded in the middle of the street, while a dead horse, carcass still smouldering, blocks the sporadic traffic.
The remains of two cars which collided head-on in their frantic bid to escape the blaze lie mangled on the road, and a five-car pile-up reveals the desperation of residents fleeing for their lives when the fire arrived.
It is believed six bodies were found in one car.
A media convoy being escorted to Kinglake was delayed at one stage as emergency crews removed another body from one of the burnt-out cars.
Saturday, February 7, 2009
Thursday - Inventory

I am posting this on Saturday because our son had an emergency appendectemy (? on spelling) on Thursday.
I ordered another case of popcorn. We love popcorn, it is easy to keep rotated. When you store popcorn, you need to make sure it is sealed well as it will either collect moisture or loose it depending on your climate. I also am getting another case of marshmallows. I know it should be in the morale booster section, but we do use it for popcorn so I am ordering another case now. We use a hot air popper, we really don't like the microwave kind - this is much cheaper anyway.
But I also have a popcorn popper that is used on campfires and it works!
If needed you can also pop it the old fashioned way on heat with oil in the bottom of your pan.
Thursday, February 5, 2009
WEDNESDAY - Recipe Day

See information in previous post about all the great things popcorn is for your storage program.
It is so hard to communicate through writing all of the thoughts I have about this. I think because we have lived in finaincial crisis in our past, the morale booster aspect is vital when you are under long term duress. The great thing about popcorn is that it counts towards your grains in your diet. It is an easy thing to store and be able to have to help lift morale.
Here are some fun popcorn recipes. You will see grocery items that are not a part of your basic foods. (I have bolded those items.) However these are things I have purchased and have on hand as part of our storage inventory. You can see that most of the items are part of your basic storage requirements. Butter is used in many of these recipes. You may want to consider purchaing some canned butter for this purpose.
Pink Sugar Popcorn
6 quarts popped popcorn
1/4 cup butter or margarine
2 cup water
1 tsp. salt
1 tsp vanilla
1/2 tsp red food coloring
Mix sugar, water, butter and salt in heavy saucepan. Bring to boil and cook for 4 minutes, Remove from heat and add vanilla and food coloring. Stir and pour over popcorn. Mix.
Old Fashioned Pink Popcorn
6 quarts popped popcorn
2 cups sugar
3/4 cup milk
1 Tbls butter
1 tsp light corn syrup
1 tsp vanilla
several drops red food coloring
Cook to soft ball stage, add vanilla and coloring. Pour over popcorn and spread on wax paper to set.
Red Hot Popcorn
4 quarts popped Pop Corn
1/2 cup butter
1/2 cup granulated sugar
1/4 cup light corn syrup
3/4 cup red cinnamon candies or cinnamon flavor
1/4 tsp. baking soda
Melt butter in medium saucepan; stir in sugar, corn syrup and cinnamon candy. Heat to a boil; continue boiling, stirring constantly, until candy is dissolved completely. Boil without stirring for 3 minutes. Remove from heat; stir in baking soda.Pour over popcorn, mixing well. Allow to cool completely on foil or buttered wax paper. Break apart and store in tightly-covered container. Makes about 4 quarts.
Popcorn Pastels
For a dramatic evvect, make 2 batches in contrasting colors.
4 quarts popped pocorn 1 2 cup sugar
2 cup light corn syrup 2 Tbs. butter
2 tsp salt 1/4 tsp cream of tartar
3-4 Tbls. Jell-o 1 tsp baking soda
Preheat oven to 250* Place popcorn in a large 4 inch deep buttered baking pan. Keep warm in oven. Cut 2 large pieces of wax paper to fit 2 cookie sheets and butter them.
In large saucepan combined sugar,m corn syrup, butter, salt, cream of tartar. Bring to boil, stirring constantly. Cook and stir until mixture reaches 250*. Stir in jello and cook until reaches 260*. Remove from heat and stir in baking soda. Stir in quickly. Remove popcorn from oven and pour mixture over popcorn. Reduce oven to 200* and bake for about an hour, stirring 2-3 times. Turn onto buttered wax paper
Jello Popcorn
1-3 oz. pkg. Jello
1 cup sugar
1 cup karo syrup
Bring to full boil, remove from heat and pour over popcorn.
Honey Popcorn
2 cup melted butter
2 cup honey
Blend and pour over
3 quarts popped corn
Mix well
Popcorn Clusters
3 quarts popped popcorn 1 cup sugar 2 cup molasses
2 cup dark corn syrup 1 tbs butter
1 tbs vinegar
Mix popcorn and peanuts in large bowl. Combined remaining ingredients in large saucepan, cook and stir over medium heat until sugar is dissolved. Add popcorn and peanuts, return to heat and cook, stirring constantly for 5 minutes. Mixture should be sticky. Spread out on buttered baking sheet and cool enough to handle. Shape into bite size clusters. Wrap individually and store in loosely covered container.
Toffee Crunch
2 quarts popcorn 1 cup butter 1 2 cup brown sugar
1/2 cup corn syrup 2 tsp soda 2 tsp salt
Spread popped corn and nuts in shallow pan. Place in preheated oven of 250*. Combine butter, sugar, corn syrup and salt in saucepan over medium heat, stirring only till dissolved. Boil till mixture reaches 248* (firm ball). Remove fro heat and stir in soda. Pour mixture over corn and gently stir to coat. Return to oven for 45 minutes, stirring every 15 minutes to coat all the corn evenly.
Candy Popcorn - Sweet and gooey! Kids love it!
4 quarts popped popcorn
1 2 cups candy (jelly beans, gumdrops, candy corn, candy canes)
3 cups mini marshmallows
1 1/3 cup sugar 2 cup butter
3/4 cup light corn syrup 1 tsp vanilla
Stir together popcorn, candy marshmallows and peanuts and set aside. Combine sugar, butter and corn syrup, bring to a boil and book for 3 minutes. Add vanilla and a few drops of food coloring if desired, pour over popcorn mixture, mix well. Set out on wax paer and break into pieces when hardened or make balls.
Popcorn with Peanut Butter
2 quarts popped popcorn
1 tbs peanut butter
2 tbs butter
Salt to taste
Melt together. Pour over popcorn & mix well.
Butterscotch Popcorn
8 quarts popped popcorn 1 c light corn syrup
1 cup peanut butter
Use favorite recipe for Butterschotch syrup (Uses brown sugar and canned milk)
Combine syrups, peanut butter, heavy saucepan. Cook over med heat to 225* or soft ball. Pour over popcorn, mix well.
Yummy and Chewy Peanut Butter Popcorn
3 quarts popped popcorn 1 cup sugar 2 cup honey
2 cup light corn syrup
In heavy saucepan, combined sugar, honey and corn syrup. Boil hard for 2 mins. stirring constantly. Remove fro heat, add peanut butter and vanilla. Stir well and pour over popcorn. Spread on wax paper to set.
Peanut Butter Popcorn Bars
12 cups popcorn 1 cup corn syrup1 cup sugar 1 cup Peanut Butter Butter 13"x 9" baking pan. In medium saucepan, over medium heat, combine corn syrup, sugar and peanut butter. Bring to a boil, stirring constantly. Reduce heat to low, simmer for 3 minutes. Remove from heat and add popcorn; tossing gently to evenly coat. Press into pan; cool. Cut into bars. Store tightly covered.
Marshmallow Peanut Butter Popcorn
4 qts popped corn
2 cup butter 3/4 cup brown sugar
1/4 cup peanut butter 20 large marshmallows
Pour popcorn into a large bowl. Combine butter, sugar and marshmallows. Cook for 1 min at a time in microwave until the mixture is melted. May take several times.
Stir in peanut butter until well blended. Pour the mixture over popcorn and stir to coat the corn before it cools
Gooey Caramel Corn
1 cup brown sugar 1 cube butter
30 large marshmallows 2 quarts popcorn
Mix and cook until marshmallows are melted, pour over popped corn.
Yummy Caramel Corn
1 cube butter 3/4 cup brown sugar
1/4 cup corn syrup 2 quarts popcorn
Melt Butter, add sugar and corn syrup. Bring to a boil. Pour over popcorn. If you want more of a candied corn, use 2 sugar and 2 corn syrup.
The Best Caramel Corn!
2 1/4 cup bown sugar 6-8 qts popped corn
1 cube butter 1 cup white karo syrup
1 can Condensed Milk 1 tsp vanilla
Bring just to a boil, stirring constantly. Pour over unsalted popped corn. Enough for a canning kettle full. Stays soft and chewy and is yummy
Butter Molasses Caramel Corn
2 cups sugar 2 cup molasses
1 tsp .salt 1/4 cup water
1 cube butter
Mix and cook to 230* or soft ball stage. Add 1 tsp baking soda. Stir in, pour over popcorn
Divine! Chewy not Sticky Caramel Popcorn
4 quarts popped popcorn 2 cup sugar
2 cup brown sugar 1/4 cup butter
2/3 cup condensed milk 3/4 cup corn syrup
optB1 cup pecans and 1 cup almonds
Baked Caramel Corn
6 quarts popped corn 2 cups brown sugar
2 cup karo syrup 1 cup butter
1 tsp salt 1 tsp soda
Boil over low heat for 5 mins. then add baking soda. Stir well. Pour over popped corn. Put on 2 cookie sheets. Bake 200* for 1 hour. Stir every 15 mins.
Worlds Easiest Popcorn Balls
3 quarts popped corn 1 pkg marshmallows
1/4 cup butter
In a large saucepan, cook marshmallows and butter or margarine over low heat until melted and smooth*. Pour over popcorn, tossing gently to mix well. Cool five minutes. Butter hands well and form 2 1/2 inch balls. Makes about 14 balls. *Add coloring if desired. Mix well
Holiday Popcorn Balls
6 tbs. butter 3 cups mini marshmallows
2 of 3 oz pkg of Jell o 3 quarts popped corn
In medium saucepan, melt butter over medium heat. Add marshmallows and stir until melted. Blend in dry Jell o. Pour over popcorn and mix well. Make into balls.
Use red Jell o for one batch and green Jell o for another for festive popcorn balls.
Jell-o Popcorn Balls
1 c. sugar
1 c. white syrup
1 (3 oz.) pkg. Jell-O
6 quarts popcorn
Cook until Jell-O dissolves (not to soft ball stage). Pour over popcorn and make into balls. Very good
Chile Cheese Popcorn
2 quarts popped corn 1/4 cup butter melted
1/3 cup powdered 1 tsp chili powder
1/4 tsp garlic salt
In a large bowl, toss all ingredients until well mixed.
Mexicali Popcorn
3 tbs butter
2 tbs dry taco seasoning mix
2 tbs chopped dried onions
2 quarts popped corn
Salt to taste
Pour melted butter and seasonings over popcorn.
Pink Sugar Popcorn
6 quarts popped popcorn
1/4 cup butter or margarine
2 cup water
1 tsp. salt
1 tsp vanilla
1/2 tsp red food coloring
Mix sugar, water, butter and salt in heavy saucepan. Bring to boil and cook for 4 minutes, Remove from heat and add vanilla and food coloring. Stir and pour over popcorn. Mix.
Old Fashioned Pink Popcorn
6 quarts popped popcorn
2 cups sugar
3/4 cup milk
1 Tbls butter
1 tsp light corn syrup
1 tsp vanilla
several drops red food coloring
Cook to soft ball stage, add vanilla and coloring. Pour over popcorn and spread on wax paper to set.
Red Hot Popcorn
4 quarts popped Pop Corn
1/2 cup butter
1/2 cup granulated sugar
1/4 cup light corn syrup
3/4 cup red cinnamon candies or cinnamon flavor
1/4 tsp. baking soda
Melt butter in medium saucepan; stir in sugar, corn syrup and cinnamon candy. Heat to a boil; continue boiling, stirring constantly, until candy is dissolved completely. Boil without stirring for 3 minutes. Remove from heat; stir in baking soda.Pour over popcorn, mixing well. Allow to cool completely on foil or buttered wax paper. Break apart and store in tightly-covered container. Makes about 4 quarts.
Popcorn Pastels
For a dramatic evvect, make 2 batches in contrasting colors.
4 quarts popped pocorn 1 2 cup sugar
2 cup light corn syrup 2 Tbs. butter
2 tsp salt 1/4 tsp cream of tartar
3-4 Tbls. Jell-o 1 tsp baking soda
Preheat oven to 250* Place popcorn in a large 4 inch deep buttered baking pan. Keep warm in oven. Cut 2 large pieces of wax paper to fit 2 cookie sheets and butter them.
In large saucepan combined sugar,m corn syrup, butter, salt, cream of tartar. Bring to boil, stirring constantly. Cook and stir until mixture reaches 250*. Stir in jello and cook until reaches 260*. Remove from heat and stir in baking soda. Stir in quickly. Remove popcorn from oven and pour mixture over popcorn. Reduce oven to 200* and bake for about an hour, stirring 2-3 times. Turn onto buttered wax paper
Jello Popcorn
1-3 oz. pkg. Jello
1 cup sugar
1 cup karo syrup
Bring to full boil, remove from heat and pour over popcorn.
Honey Popcorn
2 cup melted butter
2 cup honey
Blend and pour over
3 quarts popped corn
Mix well
Popcorn Clusters
3 quarts popped popcorn 1 cup sugar 2 cup molasses
2 cup dark corn syrup 1 tbs butter
1 tbs vinegar
Mix popcorn and peanuts in large bowl. Combined remaining ingredients in large saucepan, cook and stir over medium heat until sugar is dissolved. Add popcorn and peanuts, return to heat and cook, stirring constantly for 5 minutes. Mixture should be sticky. Spread out on buttered baking sheet and cool enough to handle. Shape into bite size clusters. Wrap individually and store in loosely covered container.
Toffee Crunch
2 quarts popcorn 1 cup butter 1 2 cup brown sugar
1/2 cup corn syrup 2 tsp soda 2 tsp salt
Spread popped corn and nuts in shallow pan. Place in preheated oven of 250*. Combine butter, sugar, corn syrup and salt in saucepan over medium heat, stirring only till dissolved. Boil till mixture reaches 248* (firm ball). Remove fro heat and stir in soda. Pour mixture over corn and gently stir to coat. Return to oven for 45 minutes, stirring every 15 minutes to coat all the corn evenly.
Candy Popcorn - Sweet and gooey! Kids love it!
4 quarts popped popcorn
1 2 cups candy (jelly beans, gumdrops, candy corn, candy canes)
3 cups mini marshmallows
1 1/3 cup sugar 2 cup butter
3/4 cup light corn syrup 1 tsp vanilla
Stir together popcorn, candy marshmallows and peanuts and set aside. Combine sugar, butter and corn syrup, bring to a boil and book for 3 minutes. Add vanilla and a few drops of food coloring if desired, pour over popcorn mixture, mix well. Set out on wax paer and break into pieces when hardened or make balls.
Popcorn with Peanut Butter
2 quarts popped popcorn
1 tbs peanut butter
2 tbs butter
Salt to taste
Melt together. Pour over popcorn & mix well.
Butterscotch Popcorn
8 quarts popped popcorn 1 c light corn syrup
1 cup peanut butter
Use favorite recipe for Butterschotch syrup (Uses brown sugar and canned milk)
Combine syrups, peanut butter, heavy saucepan. Cook over med heat to 225* or soft ball. Pour over popcorn, mix well.
Yummy and Chewy Peanut Butter Popcorn
3 quarts popped popcorn 1 cup sugar 2 cup honey
2 cup light corn syrup
In heavy saucepan, combined sugar, honey and corn syrup. Boil hard for 2 mins. stirring constantly. Remove fro heat, add peanut butter and vanilla. Stir well and pour over popcorn. Spread on wax paper to set.
Peanut Butter Popcorn Bars
12 cups popcorn 1 cup corn syrup1 cup sugar 1 cup Peanut Butter Butter 13"x 9" baking pan. In medium saucepan, over medium heat, combine corn syrup, sugar and peanut butter. Bring to a boil, stirring constantly. Reduce heat to low, simmer for 3 minutes. Remove from heat and add popcorn; tossing gently to evenly coat. Press into pan; cool. Cut into bars. Store tightly covered.
Marshmallow Peanut Butter Popcorn
4 qts popped corn
2 cup butter 3/4 cup brown sugar
1/4 cup peanut butter 20 large marshmallows
Pour popcorn into a large bowl. Combine butter, sugar and marshmallows. Cook for 1 min at a time in microwave until the mixture is melted. May take several times.
Stir in peanut butter until well blended. Pour the mixture over popcorn and stir to coat the corn before it cools
Gooey Caramel Corn
1 cup brown sugar 1 cube butter
30 large marshmallows 2 quarts popcorn
Mix and cook until marshmallows are melted, pour over popped corn.
Yummy Caramel Corn
1 cube butter 3/4 cup brown sugar
1/4 cup corn syrup 2 quarts popcorn
Melt Butter, add sugar and corn syrup. Bring to a boil. Pour over popcorn. If you want more of a candied corn, use 2 sugar and 2 corn syrup.
The Best Caramel Corn!
2 1/4 cup bown sugar 6-8 qts popped corn
1 cube butter 1 cup white karo syrup
1 can Condensed Milk 1 tsp vanilla
Bring just to a boil, stirring constantly. Pour over unsalted popped corn. Enough for a canning kettle full. Stays soft and chewy and is yummy
Butter Molasses Caramel Corn
2 cups sugar 2 cup molasses
1 tsp .salt 1/4 cup water
1 cube butter
Mix and cook to 230* or soft ball stage. Add 1 tsp baking soda. Stir in, pour over popcorn
Divine! Chewy not Sticky Caramel Popcorn
4 quarts popped popcorn 2 cup sugar
2 cup brown sugar 1/4 cup butter
2/3 cup condensed milk 3/4 cup corn syrup
optB1 cup pecans and 1 cup almonds
Baked Caramel Corn
6 quarts popped corn 2 cups brown sugar
2 cup karo syrup 1 cup butter
1 tsp salt 1 tsp soda
Boil over low heat for 5 mins. then add baking soda. Stir well. Pour over popped corn. Put on 2 cookie sheets. Bake 200* for 1 hour. Stir every 15 mins.
Worlds Easiest Popcorn Balls
3 quarts popped corn 1 pkg marshmallows
1/4 cup butter
In a large saucepan, cook marshmallows and butter or margarine over low heat until melted and smooth*. Pour over popcorn, tossing gently to mix well. Cool five minutes. Butter hands well and form 2 1/2 inch balls. Makes about 14 balls. *Add coloring if desired. Mix well
Holiday Popcorn Balls
6 tbs. butter 3 cups mini marshmallows
2 of 3 oz pkg of Jell o 3 quarts popped corn
In medium saucepan, melt butter over medium heat. Add marshmallows and stir until melted. Blend in dry Jell o. Pour over popcorn and mix well. Make into balls.
Use red Jell o for one batch and green Jell o for another for festive popcorn balls.
Jell-o Popcorn Balls
1 c. sugar
1 c. white syrup
1 (3 oz.) pkg. Jell-O
6 quarts popcorn
Cook until Jell-O dissolves (not to soft ball stage). Pour over popcorn and make into balls. Very good
Chile Cheese Popcorn
2 quarts popped corn 1/4 cup butter melted
1/3 cup powdered 1 tsp chili powder
1/4 tsp garlic salt
In a large bowl, toss all ingredients until well mixed.
Mexicali Popcorn
3 tbs butter
2 tbs dry taco seasoning mix
2 tbs chopped dried onions
2 quarts popped corn
Salt to taste
Pour melted butter and seasonings over popcorn.
Tuesday, February 3, 2009
Tuesday - Learn a New Skill

How many grains do you really need?
Did you know that with the amount recomended for wheat you would have enough flour to make 2 large bisquits per day for a year. If you would rather make bread, 300 lbs = 600 cups of flour. My recipe takes 4 cups of flour to make a small loaf. That will make 75 loaves or about 1 1/2 loaves per week per person. Whatever you have in addition to that is what you can add to your menu. You have to decide if that is enough for you and your family members.
What can you make with wheat?You can make bread, rolls, cookies, pies and other bakery items. It just doesn't have to be bread. Wheat is the most often discussed grain because it is the back bone of your storage programI have the wheat I need so I am focusing on other grains.
This week I am thinking about popcorn.
Here is a little information about popcorn:
Popcorn is one of the greatest things to have in your food storage because of several reasons:
1 - It is a great food to eat under stress.
2 - It helps to balance out your PH when you are sick.
3 - It's hard to believe a snack food that tastes so good can actually be good for you!
4 - Popcorn is a whole grain food which makes it a high-quality carbohydrate source that is not only low in calories, but a good source of fiber.
5 - Popcorn is low in calories -- only 31-55 calories in one cup of unbuttered, and when lightly buttered, one cup still only has 133 calories.
6 - Popcorn has no artificial additives or preservatives, and is sugar-free.
7 - Popcorn contains energy-producing carbohydrates.
8 - Popcorn is ideal for between meal snacking since it satisfies and doesn't spoil an appetite.
9 - Popcorn inspires creativity. While there's no doubt hot buttered popcorn is pleasing to any palate, popcorn also can be enjoyed when combined with seasonings, spices and other foods like raisins, fruit and cheese providing a nutritious, delicious snack.
Friday, January 30, 2009
FRIDAY - Learn Something New

Since the recipe this week was about bread, I think I will share something I learned last summer. I learned how to cook bread on the barb-que grill. It worked!
The heat is pretty intense so it must be pre heated and then tuirned down. I put my bread on a cookie sheet on the grill part. I closed the lid so the heat would be maintained and cooked it. It took about 8 mins longer than my oven, but it worked! I did burn my first 2 batches until I got it adjusted. The problem is the direct heat coming from the bottom. The flames must be kept at a minimum while the bread is baking.
When it was done, you could smell cooking bread all over the neighborhood and soon there were people knocking at my door!
I would suggest practicing this to get a feel for it. This is a fun project!
The heat is pretty intense so it must be pre heated and then tuirned down. I put my bread on a cookie sheet on the grill part. I closed the lid so the heat would be maintained and cooked it. It took about 8 mins longer than my oven, but it worked! I did burn my first 2 batches until I got it adjusted. The problem is the direct heat coming from the bottom. The flames must be kept at a minimum while the bread is baking.
When it was done, you could smell cooking bread all over the neighborhood and soon there were people knocking at my door!
I would suggest practicing this to get a feel for it. This is a fun project!
Thursday, January 29, 2009
THURSDAY - Inventory Needs
 I bake all of our bread so we go through quite a bit of the basic ingredients.
Looking at my inventory, it is time to buy more yeast.
Yeast can be kept in your deep freeze and is viable 5-7 years frozen.
There are 12 containers in each case and each package of yeast has 32 oz.
32 oz will give me 48 batches of 2 loaves of bread or 96 loaves of bread.
My recipe uses 1 tbsp. of yeast for every 2 loaves of bread.
Each person on average on our current diet eats about one full loaf of bread per week.
However if we were in a survival situation , that would increase to at least double.
It is time to order more yeast. I give a few to our children, so a case works great for me.
It is much more economical to buy it in large bags than to buy it in packets or smaller bottles.
You will have to check around your area to find the best prices.
Without yeast you can still make bread, but it would be flat bread. You could obviously survive, but normal bread would help morale and is more of what most of us are used to.
I will share later on various ways to cook bread, should you not have electricity.
Subscribe to:
Posts (Atom)